How to fix garage door when it keeps popping back up when you try to close it.
How to replace appliance lights over the stove
How to locate the septic tank
Information about smoke alarms
How do you fix the heater in the space under the guest bathroom (opens from the outside).
Yearly house maintenance tasks
Replacing a car battery
How do
you turn off the water for the whole house?
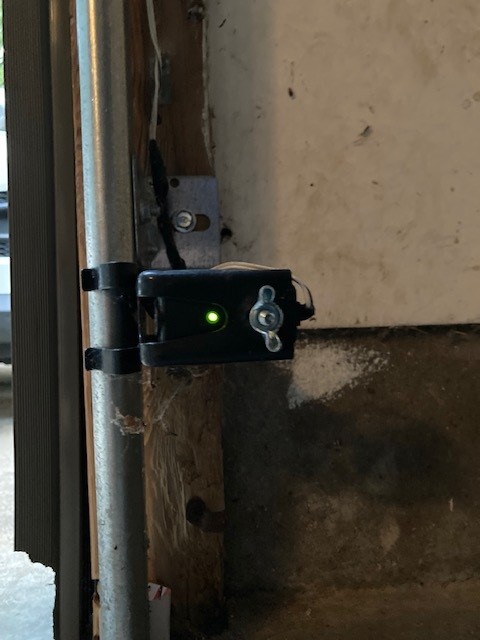
How to fix garage door when it keeps popping back up when you try to close it.
Look for the sensor on the lower right side of the garage door (click on image below to see a larger picture of it). Last time I had to just move the sensor inside the clamp to point down a little bit (I didn't move the clamp itself) Unless the sensors on the right and left side of the door are not exactly pointing at each other the door will keep popping back up. If it dosen't work keep trying to adjust both sensors (right and left) until it works.
How to replace appliance lights over the stove
- Remove the filters (clean them while they're out) you need to pull down on the white tabs on the side closest to you.
- Remove the 2 screws holding on the metal housing with a large hole where the fan is. The screws are directly behind the bulbs.
- Shut off breaker number 21 the kitchen and stairway lights (it's just left off 22)
- On the right light reach behind and and pull the socket up with the light in it. Now it's easier to remove the old bulb.
- Slide the right socket back into the housing
- Be sure to put Bulb EZ on the bulb threads of the new Bulbs. You will find Bulb EZ in drawer behind the garbage can in the garage.
- Screw the right bulb back into the socket
- You will need to unscrew the left bulb in place (no room for your hand behind it).
- Screw the new left bulb into the socket
- Turn on 21 breaker again just to be sure the new bulb(s) work
- Put the vent back together
How to locate septic tank
Click the image below to see the layout for the septic tank: 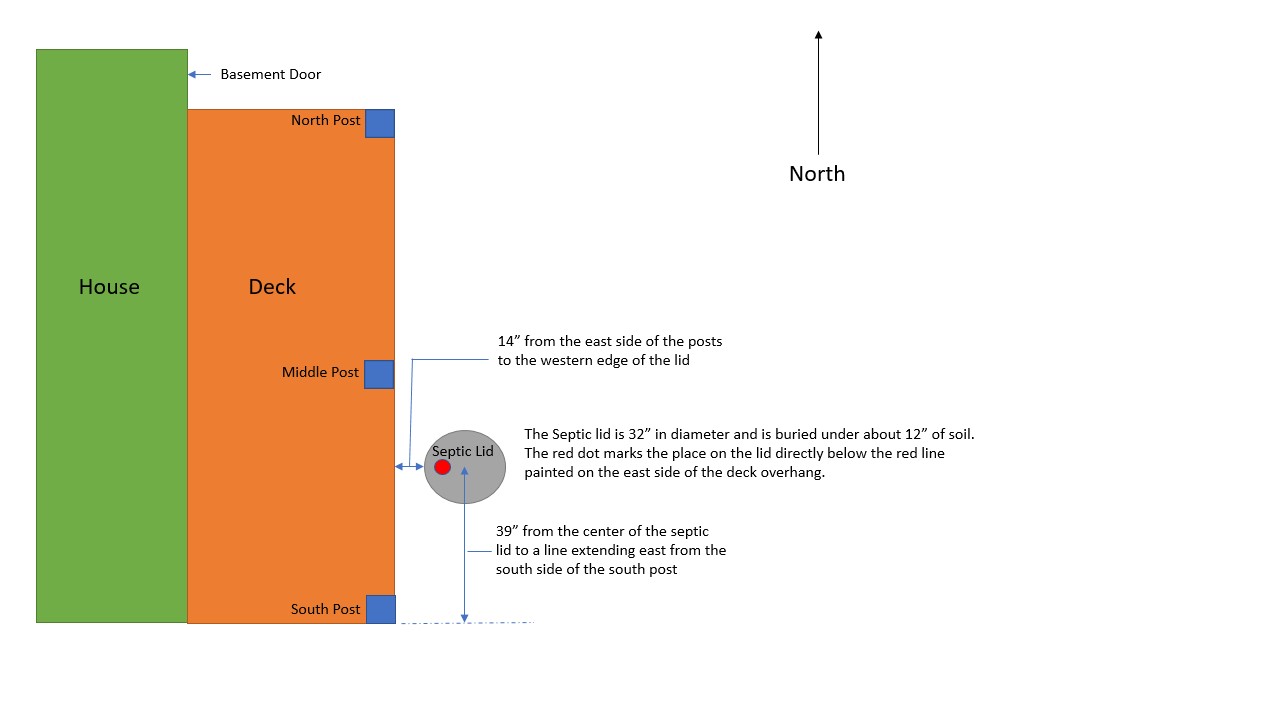
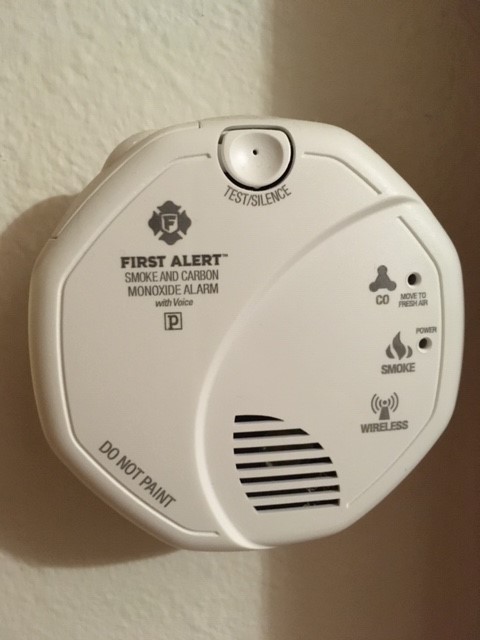
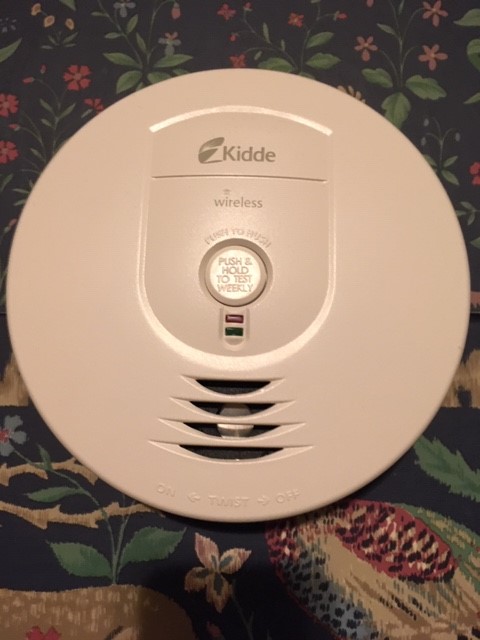
Information about smoke alarms
- Abbreivations:
- FA --- First Alert (CO2 + Smoke Photoelectric - respond faster to smoldering fires and reduce false alarms from cooking smoke or shower steam) Click on the thumbnail below to see a larger image. Click here for First Alert Smoke Alarm User Guide
- K ---- Kidde (Ionization Smoke - best for hot flaming fires but more prone to nuisance alarms) Click on the thumbnail below to see a larger image. Click here for the Kidde Smoke Alarm User Guide
- Location of alarms (Top to bottom of house):
- Master Bedroom FA & K
- Michael’s bedroom FA & K
- Top of 2nd floor stairs FA
- Bottom of 2nd floor stairs (by front door) FA
- Office (over John's desk) K
- Living Room (Ceiling between Kitchen & TV K) (under the thermostats FA)
- Kitchen FA
- Guest Room (wall by door to laundry K) (wall by door to bathroom FA)
- Hot Tub Room K
- Bottom of basement stairs K
- Pool Room FA
- Utility Room (on wall by well pump) FA
- Library FA & K
To silence a Kidde
Press the button on the front cover, the alarm will silence immediately if the smoke is not too dense. The green LED light will blink every 2 seconds for 7 minutes. After that the alarm will return to normal mode.
- To replace battery in First Alert:
- Replace battery close drawer
- Do not do the test button routine, it will cause you to lose your pairings
- If you lose your pairing with First Alert:
- Step 1: Pick a unit to be the “Teacher”
- On that unit, open and close the battery drawer (if batteries are not installed, insert them at this time.)
- This is all you do with this unit right now.
- Step 2: Prep the “Students"
- On the units you want to connect (all the other detectors, minus the “Teacher”), while the drawer is open, press and hold test button and close drawer at the same time.
- The light on the detector should be now blinking green.
- Step 3:Press and hold down the test button on the “Teacher”
- You should then hear the other units (“Students”) chirp or start talking. This will indicate they are paired.
- Step 4:Press and hold the test button on any unit to test them.
- If you paired them successfully, they should all start to test.
- Make sure you hold the test button down until each chirp or say “Testing” (voice units only).
To silence a First Alert
Press and hold the Test/Silence button for at least 3 to 5 seconds. After the Test/Silence button is released the red LED button will blink while the alarm is in silence mode.
If it’s the smoke alarm it will remain silent for 15 minutes, then go into its normal mode.
If it’s the CO alarm it will remain silent for 4 minutes, then go back to normal mode.
- To add a new First Alert alarm First Alert locations that I know of
- #1 in Childs Bedroom (Michael’s Bedroom)
- #2 in Basement (pool room)
- #3 in Utility Room (in basement)
- #4 Hallway upstairs
- #5 Master Bedroom
SCO500, SA511, and CO511 units all have a voice feature.
- In order to change/set location, follow these steps:
- Open and close the battery drawer on the unit you want to set the location on.
- The unit will begin to talk and mention “To change location, press and hold test button now.” At that moment, press down on the test button for about a second and let go. You should then hear the different location options. If you don’t, start from the beginning and try again.
- When you come to the location you would like to set, press and hold the test button down on that location. If you miss the location you want, don’t worry. The options will continue to cycle through and back to the beginning.
- Once the new location has been set, the detector will notify you by saying “(Insert Location) location has been programmed.”
Here is a video on how to pair in additioanal alarms
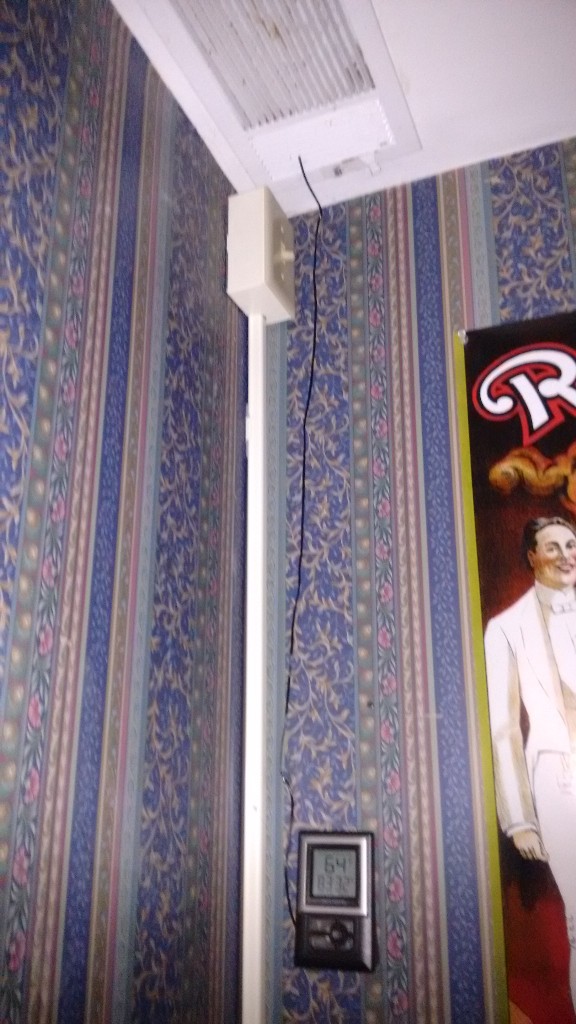
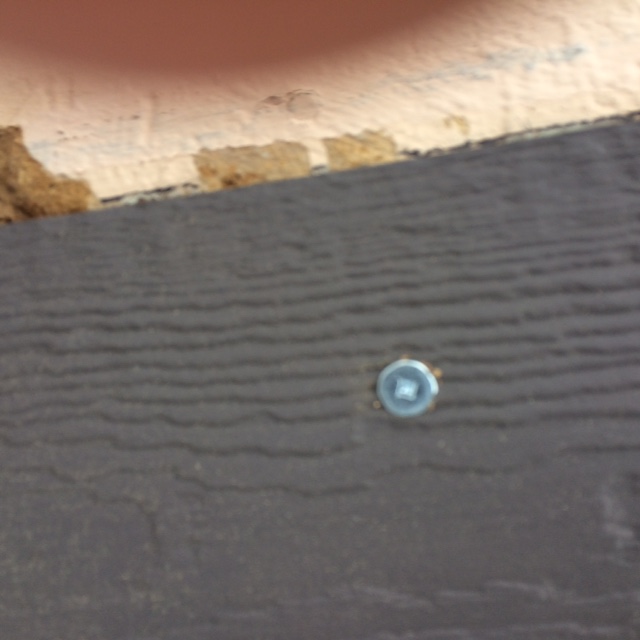
How do you work with the heater in the space under the guest bathroom (opens from the outside).
There is a switch on the wall to operate the outlet under the guestroom bathroom. It looks like a light switch. It is high on the wall (you need a chair or step stool to reach it) as you walk into the library room in the basement. Click on the thumbnail below to see it.
The switch should be down to be off. The outlet connected to this is has nothing plugged into it under the bathroom right now.
The new method for operating the space heater under the bathroom is using the BAYITE BTC211 Digital Temperature Controller. Click on the thumbnail below to see it. (It is located on the lower right as you walk into the exercise room).

This is connected to the space heater under the bathroom.
Click here for a Quick step guide on how to use the BAYITE BTC211 Digital Temperature Controller.Click here for more detail information on the BAYITE BTC211 Digital Temperature Controller.
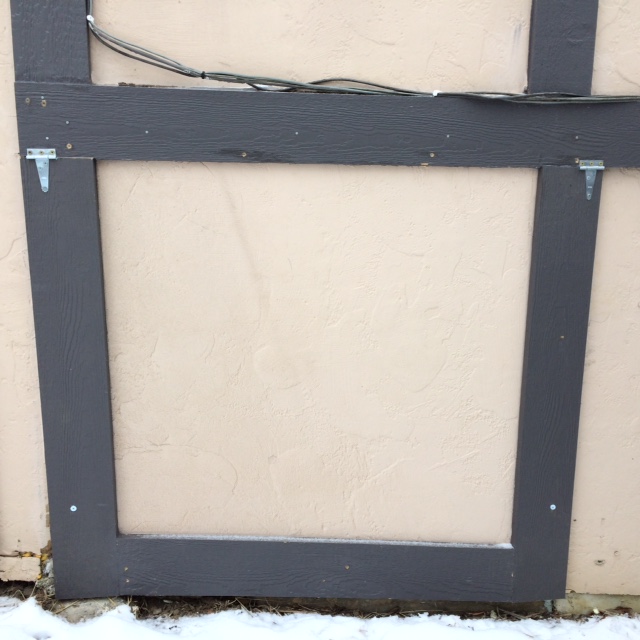
Enter the outdoor storage area under the guest room bathroom. The entrance is just south of the deck off of the guest bed room. Click on the thumbnail below to see it from the east side of the house.

Remove the 2 screws at the bottom of the door. Use a #2 square drive bit for the power drill to loosen them. Click on the thumbnail below to see .
Click on the thumbnail below to see what it looks like after opening the door (prop it up on the hinges afer removing the 2 lower screws).
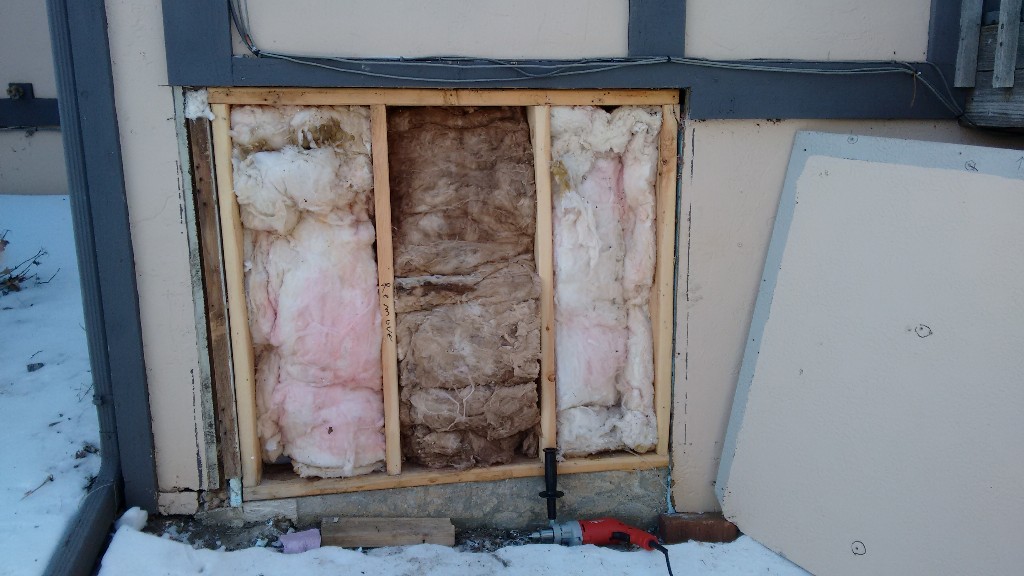
You now have exposed 3 panels which are filled with fiberglass insulation. Remove the insulation between the 2 panels on the left (leave the insulation in the panel on the right).
Now use a hammer to loosen and remove the 2x4 piece of wood between the first and second panels (on left side as you face it).
Now remove the plastic pieces of insulation on the left side only until you have a hole you can climb through into the crawl space.
You will see a 2x4 on the left just as you enter the crawl space. Take off the latch holding it up. Bring it down. You will see a thermostat. It is set to about 40%. Do not bring it down below that. It is faulty in that it will turn off even though you are not to the off mark yet. The thermostat controls the power to the outlet. The baseboard heater is plugged into that outlet and is on whenever there is power to the outlet. If the pipes are freezing it means either the thermostat is malfunctioning or the baseboard heater is malfunctioning.
When you have put the insulation back in place close the hinged door and use the power drill with the #2 square drive bit to replace the 2 screws on the bottom of the door.
Yearly house maintenance tasks
Use this tool to switch the septic lines. Here’s how it works:
We had originally 3 lines on the top side of the “fern yard”. When
the guy from Kalona added the 3 lower lines (closest to Chia’s) he
put a switch station in the top of the yard (it’s the pipe coming
out of the ground just east of Kate’s porch).
He said we need to switch every 6 months using that switch station.
The tool (see septic pic attachment) is hanging on the north wall of
the shed. Click on the thumbnail below to see it.

To switch the lines you tap off the lid to the switching station and use the tool to rotate the knob at the bottom of the pipe 180 degrees. It will only go one way, Make sure it’s turned all the way in that direction each time you do it (every 6 months). I do it on the spring and autumn equinox (March 21st and September 21st). After turning it make a note on the calender on the fridge.
Oil the garage door once or twice a year oil (all very lightly - less as years go by):
(1) the bearings in the rollers that ride the 2 rails (2) a light bead over the spring
(3) on the bearings of the big wheels at the ends of the rod holding the large spring
(4) the hinges on the door itself
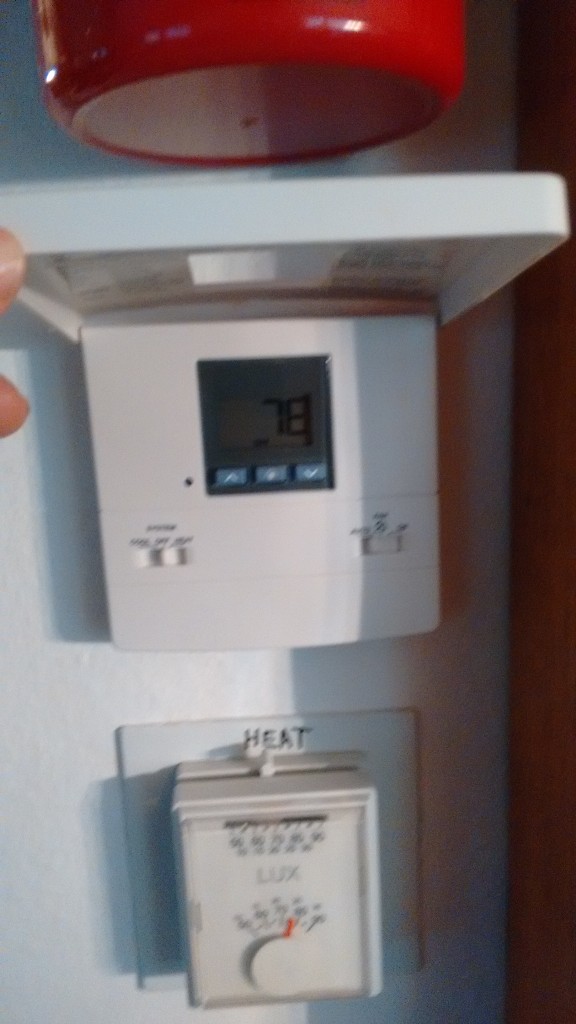
Spring:
Turn the switch in the furnace room to “Off” .Click on the
thumbnails below.
Turn all the heat thermostats down to 55 degrees. The only tricky
thing here is that there is one A/C thermostat in the living which
needs to have the following adjustments:
Left up the cover, and turn the System toggle switch to “Cool”.
Leave the fan always on “Auto”. Click on the thumbnail below.
Turn the switch to off (down) that is in the hallway going into the
library from the pool room click on the thumbnail below.
Fall
Turn the switch in the furnace room to “On”. Click on the thumbnails
below.
Turn all the heat thermostats down to 72 degrees (or whatever temp
you want for the winter. The only tricky thing here is that there is
one A/C thermostat in the living which needs to have the following
adjustments:
Left up the cover, and turn the System toggle switch to “Off”. Leave
the fan always on “Auto”. Click on thumbnail below.
Turn the switch to on (up) that is in the hallway going into the
library from the pool room. Click on the thumbnail below.
Replacing a car battery
When you take the battery out undo the negative terminal first.
When you put the battery back attach the negative terminal last.
Use a 10mm socket wrench.
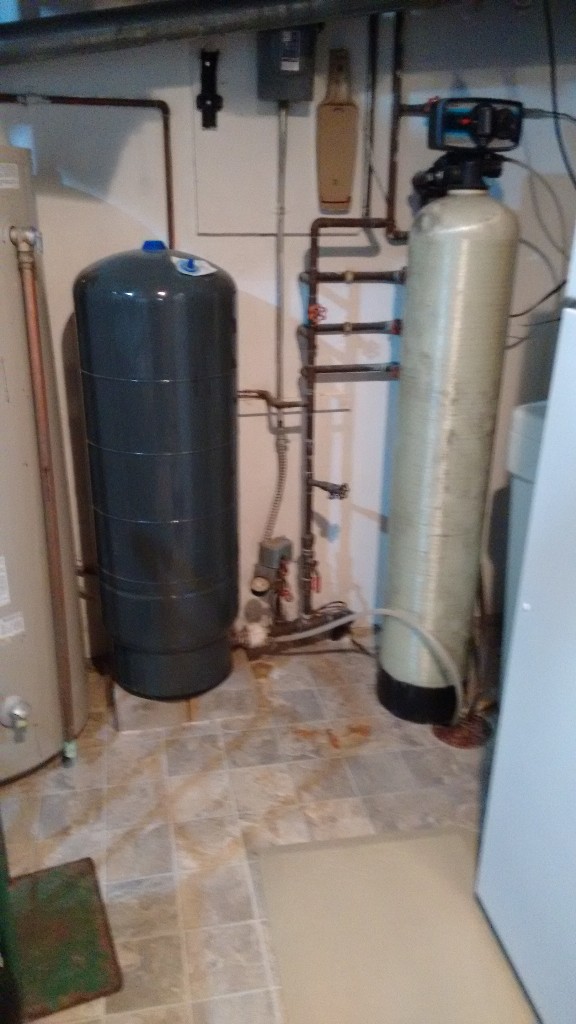
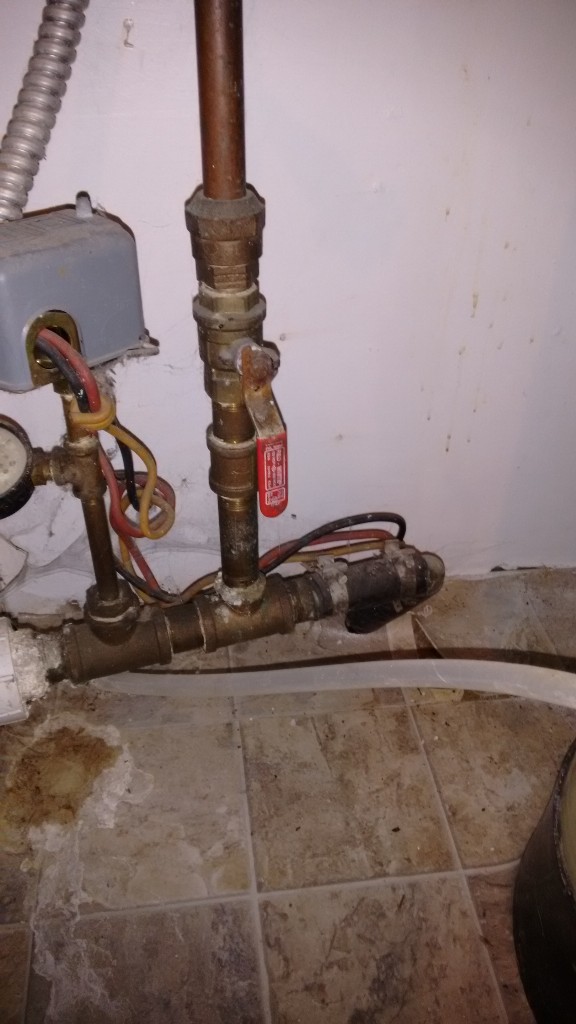
How do you turn off the water for the whole house?
In the basement utility room look to your right after passing the refrigerator. You'll see some pipes running up the wall. At the lower end of one of them is a red valve. It is pointing down when the water is on. It points to the side (9 o'clock) when it is closed. To turn off the water turn it from the 6 o'clock position to the 9 o'clock position. Click on the thumbnails below to see a couple snapshots of the valve. (It's open in these pictures.